Redis Variable Management
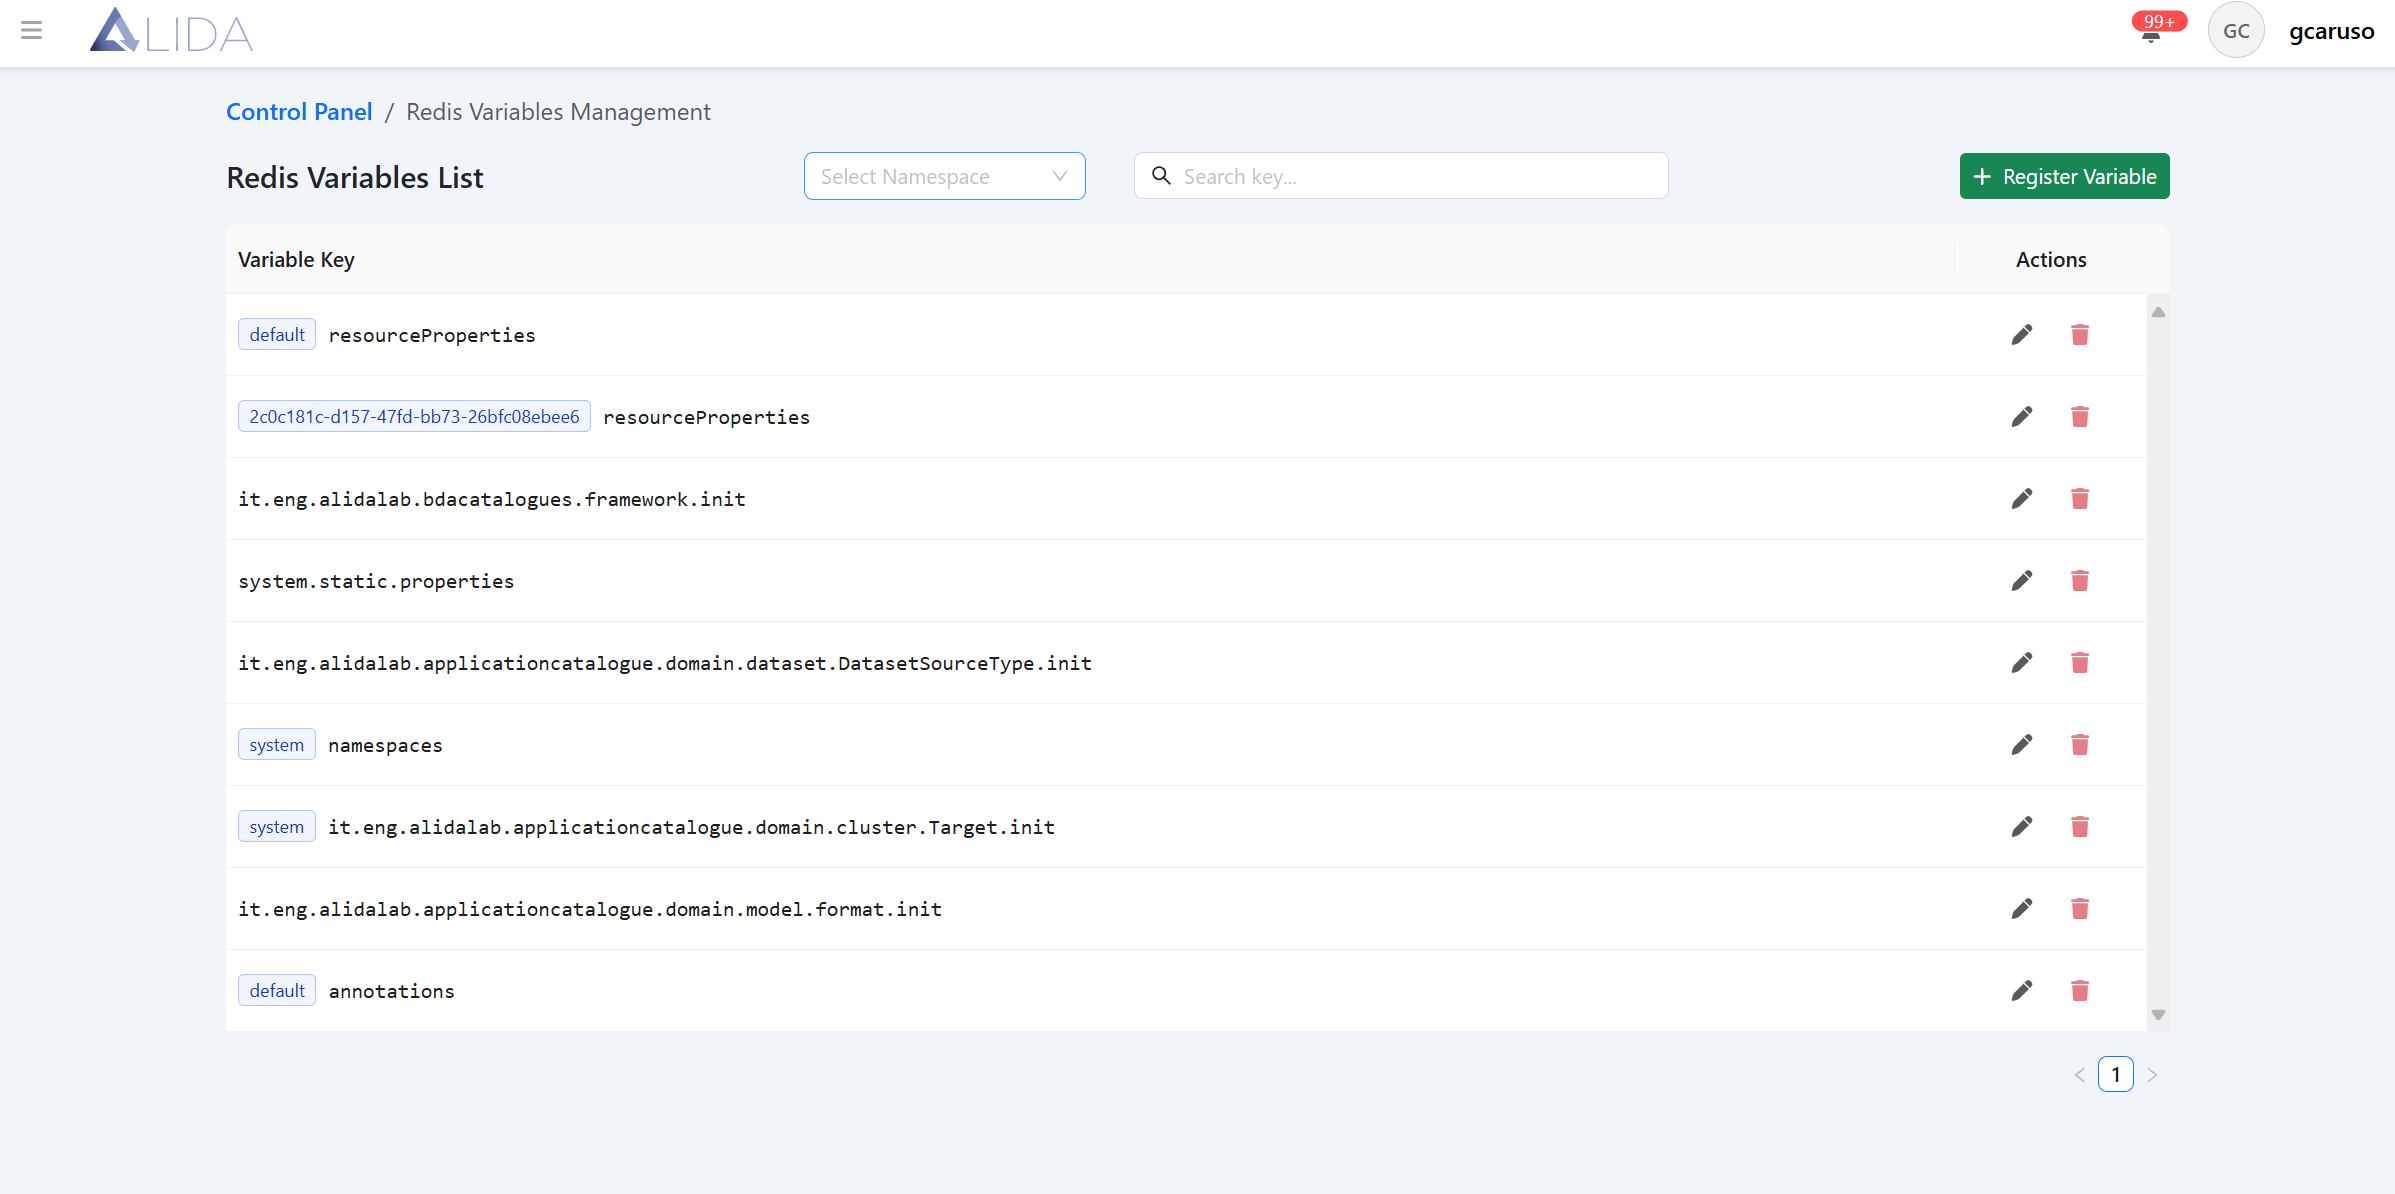
You can access the Redis variable management panel from the control panel page:
Viewing Redis Variables
Once you open the variable management panel, you will see a tabular list of Redis variables
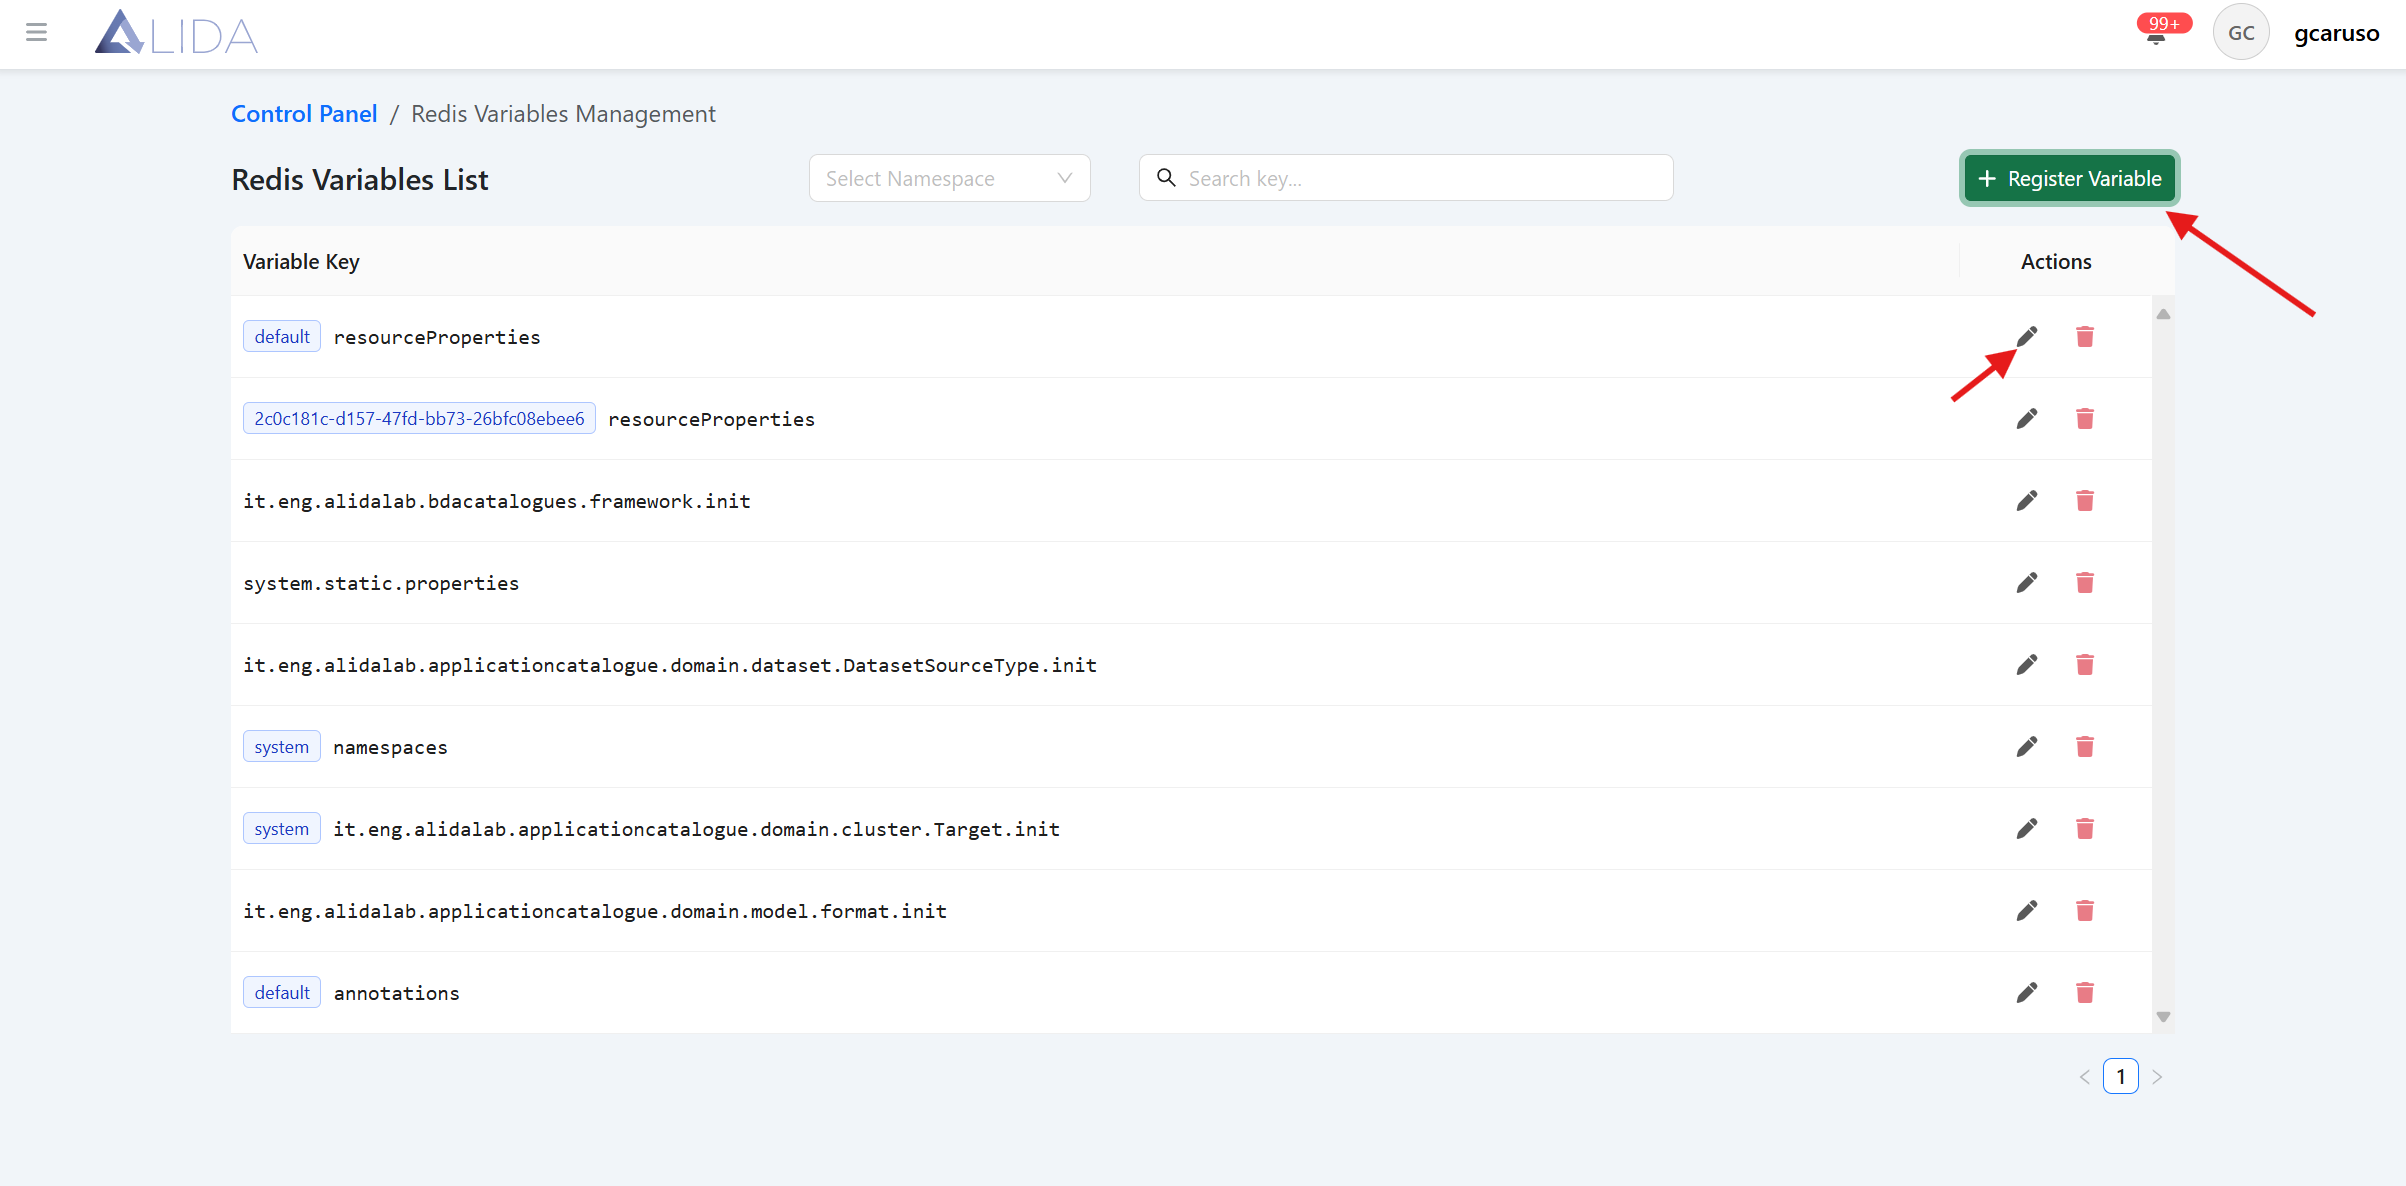
For each variable, you can:
| Function | Button |
|---|---|
| Access the edit form |  |
| Delete it |  |
Creating/Editing a Redis Variable
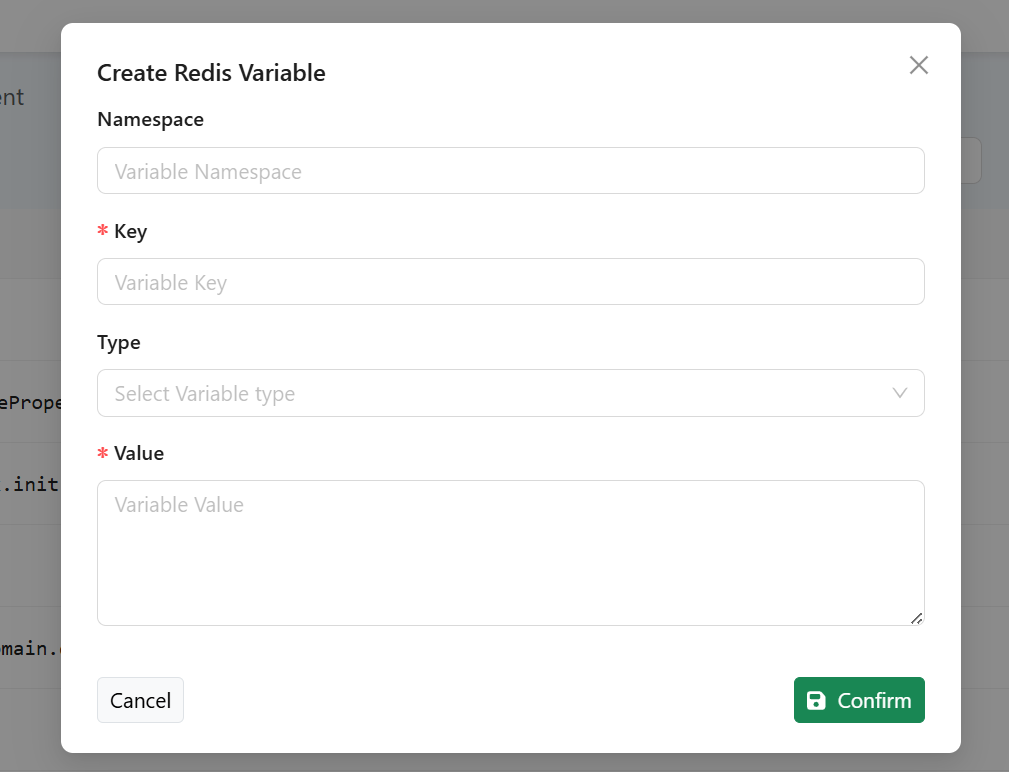
From the Redis variable management page, clicking the "Register Variable" button, or clicking the edit icon in the table record, will open the form for creating/editing a Redis variable:
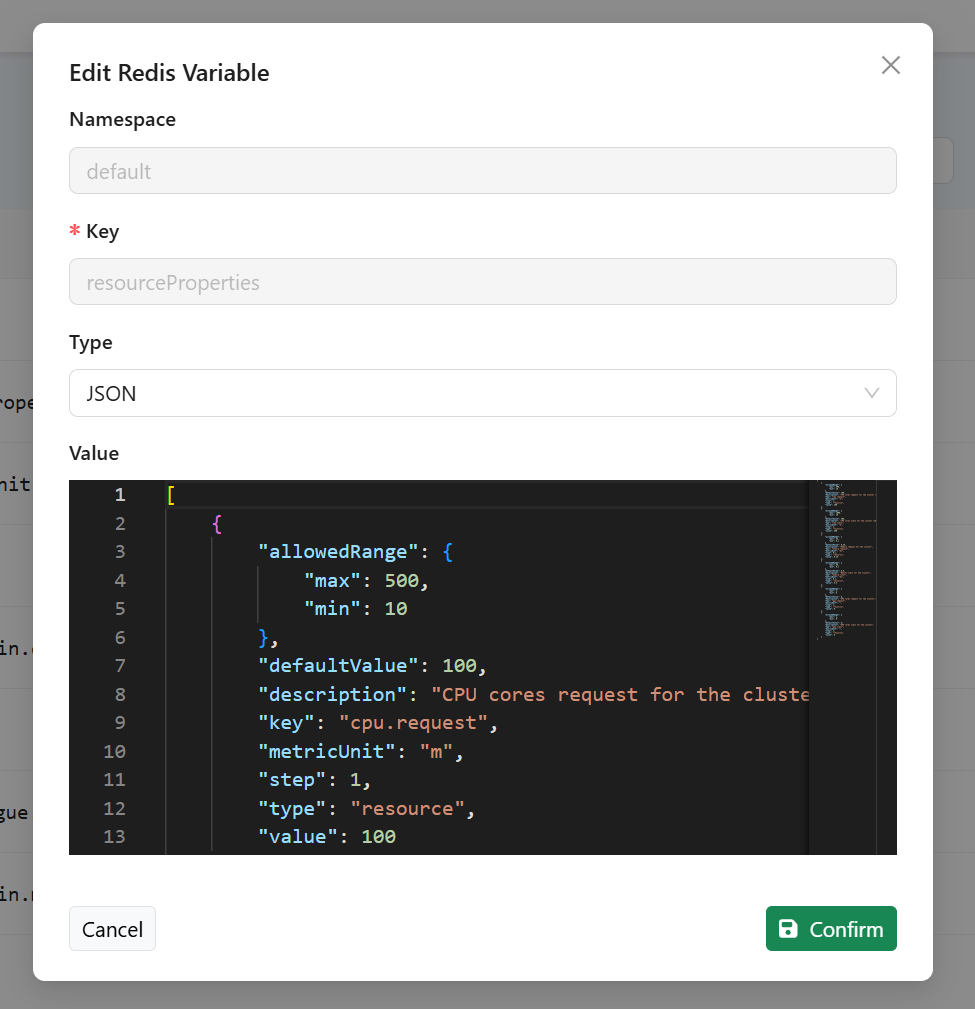
Specific Variables
Defining Namespaces
The administrator can define a list of Kubernetes namespaces that can then be selected by the Data Scientist in the UI to determine where the Workflows will be executed.
By default, this list contains the namespace alida, which identifies the set of "standard" nodes of the ALIDA cluster dedicated to executing the Workflows.
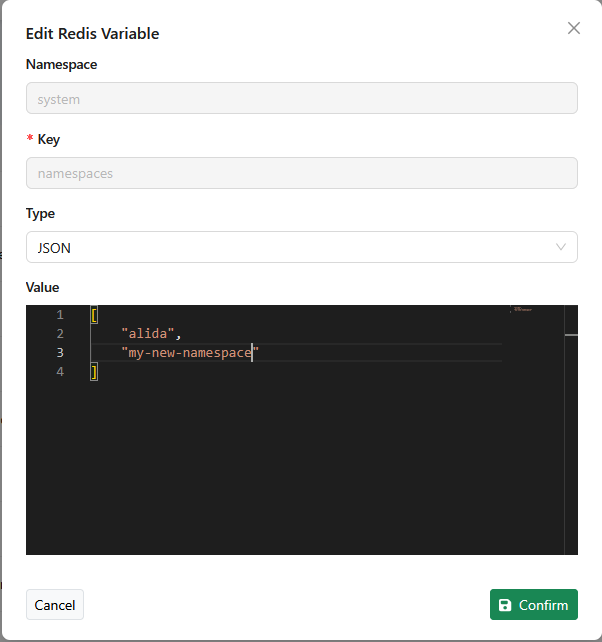
The administrator, after defining additional namespaces at the system level, can list them from the control panel by modifying the value
of the Redis variable namespaces.
Upon opening the edit panel for the variable, they can specifically add the names of the namespaces to the JSON array. As shown in the figure:
Defining Annotations
As indicated in Annotating Services and in Annotating Workflows, ALIDA allows associating structured notes to Workflows and to the individual Services that compose them. These notes must be previously defined by an ALIDA administrator.
To define the annotations, open the edit panel for the Redis variable annotations
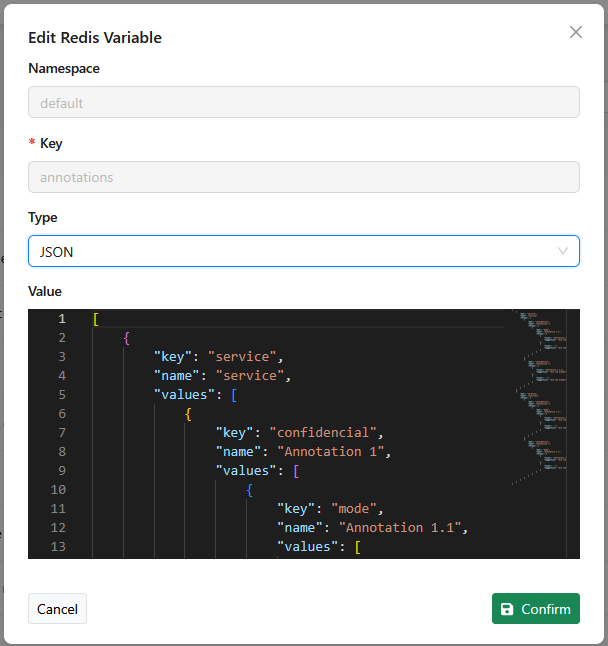
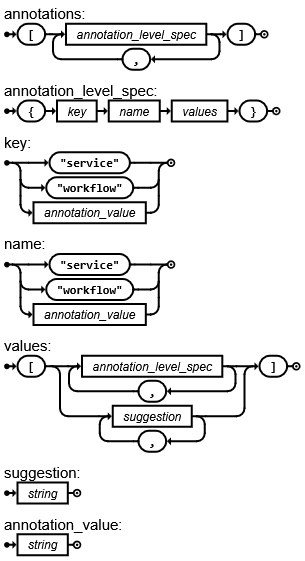
A single annotation consists of a sequence of N elements, where the N-th element can be chosen from a list of possible values.
The possible annotations are defined by the administrator as a tree. This tree is defined through a JSON.
 Let's look at some examples.
Starting from the following base template, it is possible to define annotations for Services or Workflows:
[
   {
      "key":"service",
      "name":"service",
      "values": []
   },
   {
      "key":"workflow",
      "name":"workflow",
      "values": []
   }
]
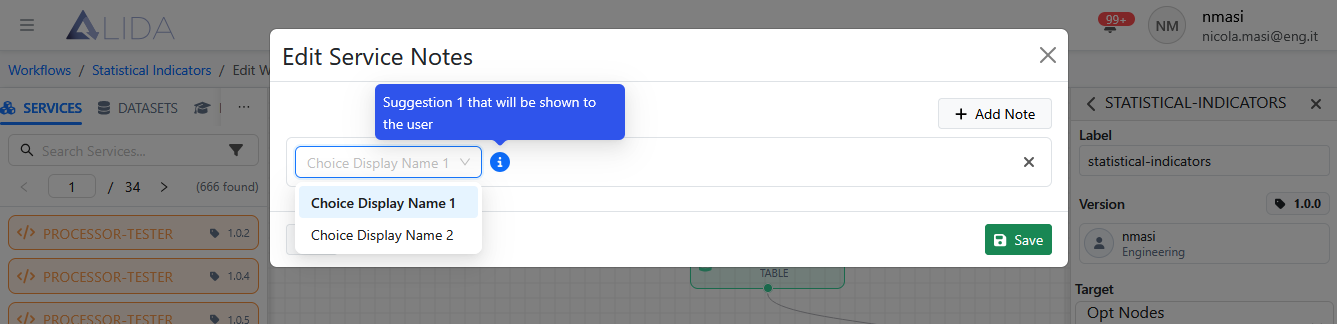
For example, let's define two single-value Service annotations:
[
   {
      "key":"service",
      "name":"service",
      "values": [
        {
          "value": "Choice Display Name 1",
          "suggestion": "Suggestion 1 that will be shown to the user"
        },
        {
          "value": "Choice Display Name 2",
          "suggestion": "Suggestion 2 that will be shown to the user"
        }
      ]
   },
   {
      "key":"workflow",
      "name":"workflow",
      "values": []
   }
]
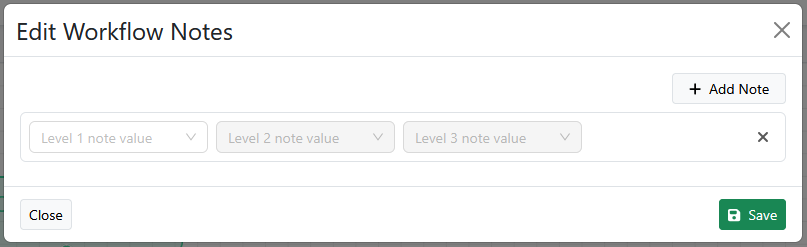
In the UI, we will have:
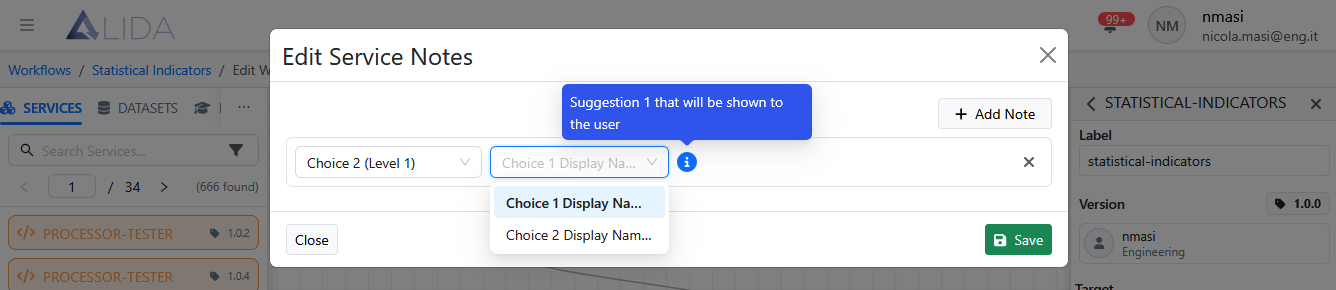
Let's extend the example adding another level. We will thus define four possible annotations.
[
   {
      "key":"service",
      "name":"service",
      "values": [
        {
          "key":"option-1",
          "name":"Choice 1 (Level 1)",
          "values": [
            {
              "value": "Choice 1 Display Name (Level 2)",
              "suggestion": "Suggestion 1 that will be shown to the user"
            },
            {
              "value": "Choice 2 Display Name (Level 2)",
              "suggestion": "Suggestion 2 that will be shown to the user"
            }
          ]
        },
        {
          "key":"option-2",
          "name":"Choice 2 (Level 1)",
          "values": [
            {
              "value": "Choice 3 Display Name (Level 2)",
              "suggestion": "Suggestion 3 that will be shown to the user"
            },
            {
              "value": "Choice 4 Display Name (Level 2)",
              "suggestion": "Suggestion 4 that will be shown to the user"
            }
          ]
        }
      ]
   },
   {
      "key":"workflow",
      "name":"workflow",
      "values": []
   }
]
In the UI, we will have:
General Rules
In general, it is possible to define annotations at N levels.
For levels 1 to N - 1, the possible attributes are:
keyidentifies the level.nameis the name of the option shown to the user
For the final level N, the only attributes are:
valueis the name of the option shown to the usersuggestionis the suggestion that will be shown to the user
General Syntax